
Design Process
Market Research
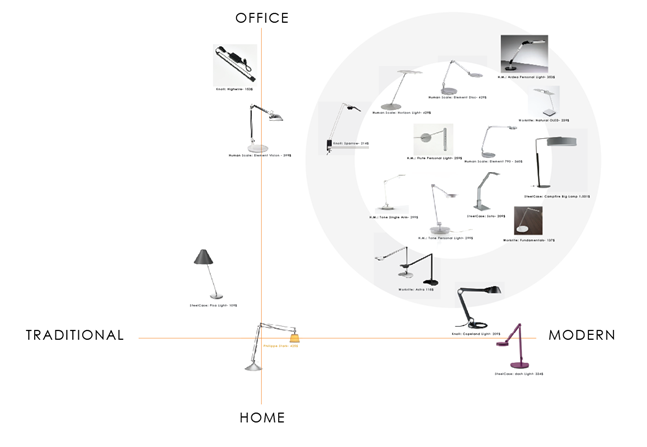
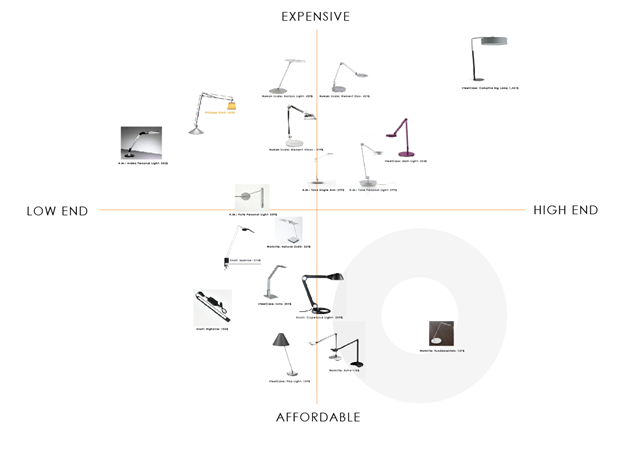
Before I start any project I look at current solutions on the market, I’ll make a graph and screen shot competitive products. It helps me to visually understand what available to consumers, price points, and gradations of aesthetic appeal. It’s not an exact science but sometimes when I compare these graphs with information on sourcing sites like Alibaba it can help reverse engineer the cost of the product, and identify commonly components.
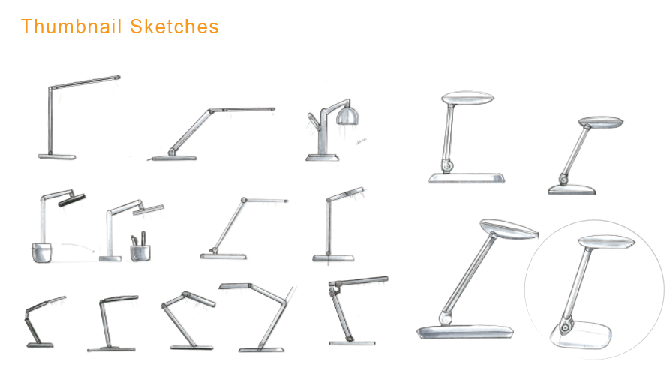
2. Concept Sketching
I start with small thumbnail sketches trying to brainstorm new forms and explore new ideas.
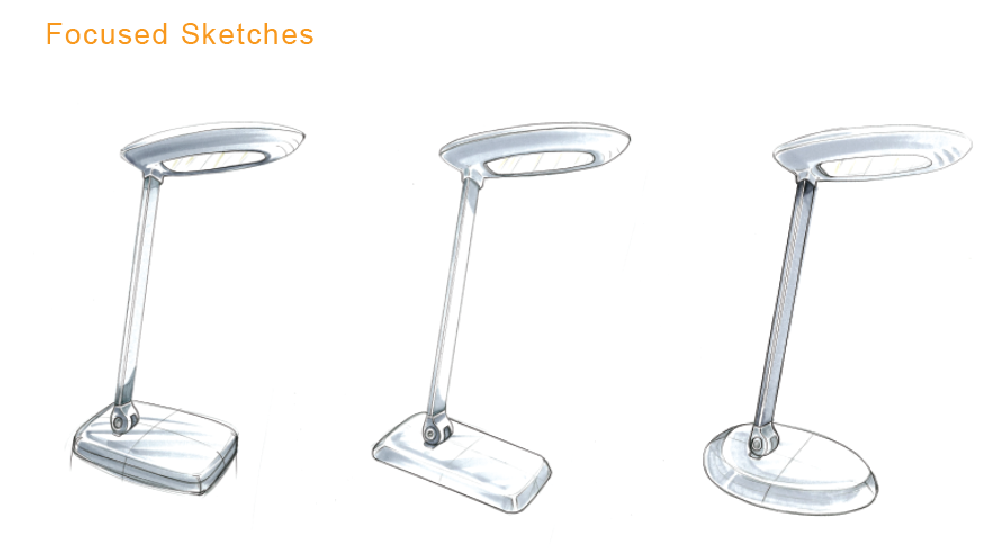
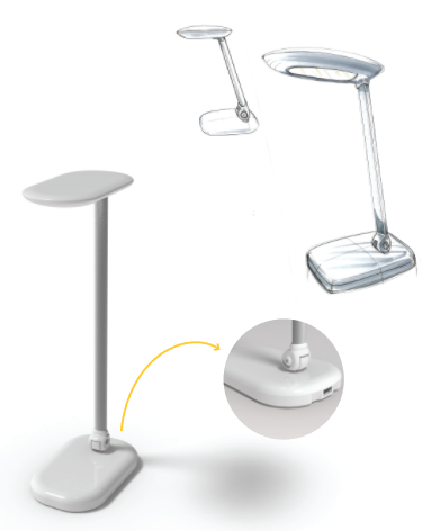
I converge on a couple of directions and add more detailed views of the front, side, back, and 3/4 views.
From there I’ll converge further into a single solution and add some rendered color and interior details.
3. CAD modeling
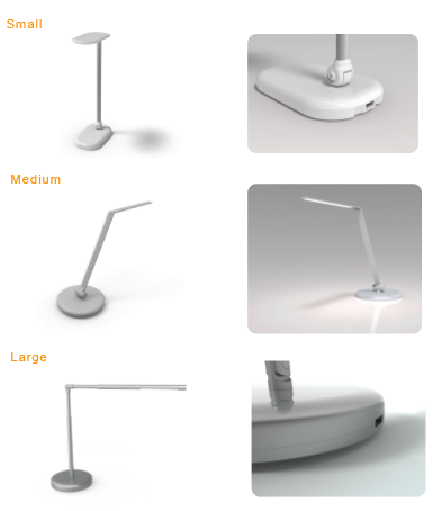
Before I start CAD modeling, I try to make a quick paper model, or foam model, or print out the flat pattern dimensions that I’m trying to work with to estimate the appropriate scale. Sometimes I can use my market research to inform scale decisions, sometimes the size of a products internal components dictate the size or shape. It’s a compromise of form and function.
4. Prototyping Example : Tanning Spray Gun
This project was to redesign a spray tanning gun for a client. He had some existing components, but felt that the current options on the market weren’t very well branded and too heavy, he wanted to create something that accommodated a smaller concentrated tanning solution container.
Here is the process of taking a 3D print and creating a presentation model.
The parts were too large to print on the Form Labs platform so they needed to be printed in 4 parts instead of 2
The parts were super glued together and the excess was sanded off to give the sides of the gun with an intentional parting line
We set to work bondo-ing parts to hide the imperfections in the 3D print, and working to create a smooth surface
The parts were sprayed with high build primer and further sanded down with sand paper grits 200-800 and finally wet sanded with 1000-2000 sand paper
The parts were cleaned and propped up for spray painting
The parts were spray painted with an hour between coats and fully dried for 24-48 hours [It’s hot in Arizona so it dried faster]
Once the parts were dried, they were assembled and glued together.


